Showing posts with label snack. Show all posts

Friday, 22 August 2014

Banana and cinnamon cake

Firstly, I must start with the apologies. Over the last few weeks I've had terrible nightmares of you all sat around, hungry and wondering what the fuck happened to the awesome recipes I used to deliver on a regular basis. I wish I could give you some sort of sordid, debauched excuse but the sad fact is that I just haven't had any time to devote to the site due to securing a new job, moving house, selling my car and then losing the job before I even started. Long story... 

So since I'm once again spending my days trawling through job websites and chilling with the dog on the sofa, I have time to cook and write. This first recipe didn't require much thought as I was hungry for something sweet and, given that I'm trying to save the pennies, decided to resort to making something super easy and super quick. 

This was one of the cakes I used to have to make every Wednesday morning for the 5 months that I was a chalet host in the French Alps (you can read all about it in this fantastic book I wrote - click here). It was a favourite of the guests and, since I had some bananas on the turn, I thought I'd make it today.

How it's done

Nothing cheffy here, we used to bash this one out in a matter of minutes in the chalet and I did the same thing today.

  • 2 ripe bananas
  • 2 eggs
  • 175g of self-raising flour
  • 125g caster sugar
  • 125g softened butter
  • Cinnamon
  • Nutmeg

All you need to do is cream together the butter and sugar before adding the eggs and either going nuts with a hand mixer or using brute force. Then just sift in the flour and spices before folding the mixture. Finally, mash the bananas with a fork or masher and then throw them in and stir. Then all you need to do is pour the mixture into a non-stick or greased cake pan (I seem to have lost my smaller one in the move hence the large, slightly thin cake I've made here and then cut into slices) and stick into the middle of an oven pre-heated to 175C for 25-30 minutes. As usual, check the middle with a skewer or knife to make sure it's cooked. 

Boom. Perfect with a decent cup of tea. 

Tuesday, 8 July 2014

White chocolate and raspberry cookies

I've been getting these bad boys from Subway for years and then it twigged on Sunday - I'm an awesome cook, surely I can make them better than the ones I've been having. Turns out, I can. These are soft, crumbly and the perfect combination of white chocolate and raspberry. She'll be eating out of the palm of your hand if you break these out.

How it's done

This recipe actually turns out around 26 cookies so you'll be in the good books for ages until they run out. Don't say I never give you anything.

  • 250g unsalted butter (soft, at room temperature)
  • 130g light brown sugar
  • 130g caster sugar
  • 1 egg
  • 1 egg yolk
  • Pinch of salt
  • Teaspoon of bi-carbonate of soda
  • 340g plain flour
  • 100g white chocolate chunks
  • Some fresh raspberries

First things first. Cube up the butter and stick in a bowl with the two sugars. Use a hand mixer, table top mixer or just your brute strength to combine until creamy. Add the egg and egg yolk (if you've never separated a yolk from the white, the easiest way I find is to break an egg gently into your hand over the sink and then just spread your fingers a little to let the white run through them). Beat this together before adding the flour, salt and bi-carb. At this point it will start to get tougher to mix which is what you want - the mixture is turning into a cookie dough. Slice some fresh raspberries in half (not too many otherwise the mixture will end up too wet), and add them with the chocolate chunks. Mix this together before covering and sticking in the fridge for 45 minutes to chill.

Get the oven on to 180C or 160C if it's a fancy fan one. Lay some baking powder out on some baking trays (if you have none like me, just use some butter to grease the trays first). Then just take a tablespoon of mixture and roll into a ball. Place onto the tray and just push it down a little to flatten it a bit. Make sure you leave enough room around each one as they expand during cooking - you may have to do a number of batches to get through the whole mixture. That's it, just get them into the oven for 12 minutes or until they start to brown around the edges. When you get them out of the oven, leave them to cool on the tray for a few minutes before transferring to a wire rack to cool completely.

Now surprise her with a cup of tea and one of these bad boys and just watch the reaction....

Sunday, 15 June 2014

Double chocolate apology muffins

So, since I figure there's a lot of dudes out who will be needing to apologise over the next few weeks - whether it's for hogging the TV or being delivered home by the constabulary after drowning their sorrows following England defeats (I'm only going on what happened last night here) - I decided it would be a good idea for us all to have a chocolate recipe to hand. The perfect way to say sorry.

These muffins contain a secret surprise in the form of a delicious dark chocolate ganache piped into the middle. You can, of course, leave that out if you can't be arsed but it might be the tipping point that gets the object of your desires into the bedroom for the first time, or the Mrs to indulge a fantasy that she has so far resisted. It could be that neither of these things as a result of adding the ganache happen but are you able to live with not knowing?

How it's done

The one downside to this recipe is that you do need to go and buy something called tulip cases from the supermarket. Pick your cashier wisely when going through the checkout with these, since you don't want to damage your reputation. 

  • 165g butter (at room temperature)
  • 300g caster sugar
  • 2 teaspoons vanilla extract
  • 3 eggs
  • 70g self raising flour
  • 200g plain flour
  • 1 teaspoon bi-carbonate of soda
  • 70g cocoa powder
  • 222ml milk
  • 25ml malt vinegar
  • Large bar of milk chocolate
Get the oven on to 160C if it's a fancy fan one, otherwise it's 180C, and put 12 tulip cases into a muffin tin. Measure out the milk into a jug, add the vinegar, stir and put to one side. 

Next, cream the butter and sugar together in a large bowl - you can do this with a mixer or by hand if you want to maintain a shred of masculinity. Once they're mixed together, add the eggs and vanilla extract and stir. Now add all the dry ingredients (the flour, bi-carb and coca powder, you bell). They don't need to be sifted, who's got time for that anyways? Finally, add the milk and vinegar mixture into the bowl and mix everything together to make an awesome, chocolate batter. 

Grab a couple of normal dessert spoons and use those to fill each tulip case to about 2/3 full. When that's done, take your chocolate bar and chop it up into chunks before throwing a few on to the top of each muffin. Get these into the middle of the oven for around 25-30 minutes.

If you are going the whole hog and want to get the ganache in there too, you will also need to buy 150ml of double cream and 150g dark chocolate (it's quicker and easier to just buy a bag of dark chocolate chips). Get the cream into a pan and bring it to the boil. When it starts to bubble, turn off the heat and throw in the chocolate chips. After a couple of minutes, stir it to make a nice, smooth ganache. Leave this to cool for around 15 minutes.

When the muffins have been out of the oven a few minutes, get a sharp knife and run it down through one of the cracks in the top. Wiggle it around inside the muffin to create the hole for the ganache. Take the cooled ganache and stick it into a piping bag with a thin nozzle. Put the nozzle into the hole you've created and pipe ganache in until the muffin plumps up. Now just leave the muffins somewhere to cool completely.

There you are, you're done and clear to watch the rest of the World Cup in peace! 


Sunday, 8 June 2014

Cookie-stuffed cookies

These little beauties are the shit - fact. Honestly your Mrs will not be able to hide the delight she gets from biting into a freshly-baked cookie and then finding another cookie inside. They are a one-way ticket into the good books for an indeterminate amount of time so you might want to bust them out when you've got some making up to do. 

If your Mrs doesn't look like she needs two cookies in one sitting (if you get my drift...), then you can always leave the Oreo out and use this as a straightforward, yet awesome, chocolate chip cookie recipe. 

How it's done


  • 310g plain flour
  • 1 teaspoon baking powder
  • Pinch of salt
  • 225g unsalted butter (at room temparature)
  • 150g brown sugar
  • 100g granulated sugar
  • 2 eggs
  • 1 teaspoon vanilla extract
  • 150g milk chocolate chips (or bars chopped up)
  • Oreo cookies
In a mixer (or in a bowl with a hand mixer), cream together the butter and sugars. Then throw in the eggs and vanilla extract and mix together. Sift in the flour, baking powder and salt before mixing everything together. Use a wooden spoon to fold in the chocolate chips.

You can, at this point, stick the cookie dough into the fridge to chill for a while (overnight if you like) but it is up to you. 

When you're ready to make the cookies, get the oven on at 175C. All you have to do now is take a tablespoon of the cookie dough, roll it into a ball and put it on top of an Oreo. Get the same amount of dough again and put it onto the bottom. Press the edges of the dough together so that you can't see the Oreo cookie any more and place onto a baking sheet or greased baking tin. Stick them into the oven for 10-12 minutes or until the edges start to go brown. Leave them to cool on a wire rack before handing over to the Mrs and awaiting your reward.

Wednesday, 4 June 2014

Gluten-free sundried tomato and parmesan bread

OK so I know you saw the title and thought I'd gone soft, especially since the last post was a vegetarian one and now we're going gluten-free. Don't worry my friends, the meat will return in a big way in the next post but, given that I was in the company of someone who is allergic to gluten at the weekend and didn't want her puking up everywhere, I decided to indulge in some gluten-less baking.

This one was actually a bit of a result due to the fact that the person in question was adamant that gluten-free baking is terrible and that I was wasting my time in even attempting to make this. 'Relax', I said, 'for I am an awesome cook.'

To be quite honest I had no fucking idea if this recipe was going to work out or not, but God loves a trier. You can imagine my glee when the person in question ate her pre-cook criticism as well as half of the loaf when it came out, yes you guessed it, awesome. 

In all fairness this could well have been beginner's luck and she does know a lot more than me when it comes to gluten-free cooking (since I bloody love gluten) but either way, we were both happy with the outcome. So, my friends, keep this in the back pocket in case you ever encounter someone who will run a mile if they so much as see a standard loaf of bread.

How it's done

This is really simple and surprisingly tasty. The making part only takes around 15 minutes and then you can just leave it in the oven for an hour to work it's magic, pleasing your allergic friend with it's gluten-less aroma.

  • 200g gluten-free white flour
  • 1 teaspoon salt
  • 3 teaspoons gluten-free baking powder
  • 284ml whole milk with a squeeze of lemon juice
  • 3 eggs
  • 1 tablespoon tomato paste
  • 2 tablespoons olive oil
  • 50g sundried tomatoes (the ones you get in the jar with oil)
  • 50g grated parmesan cheese

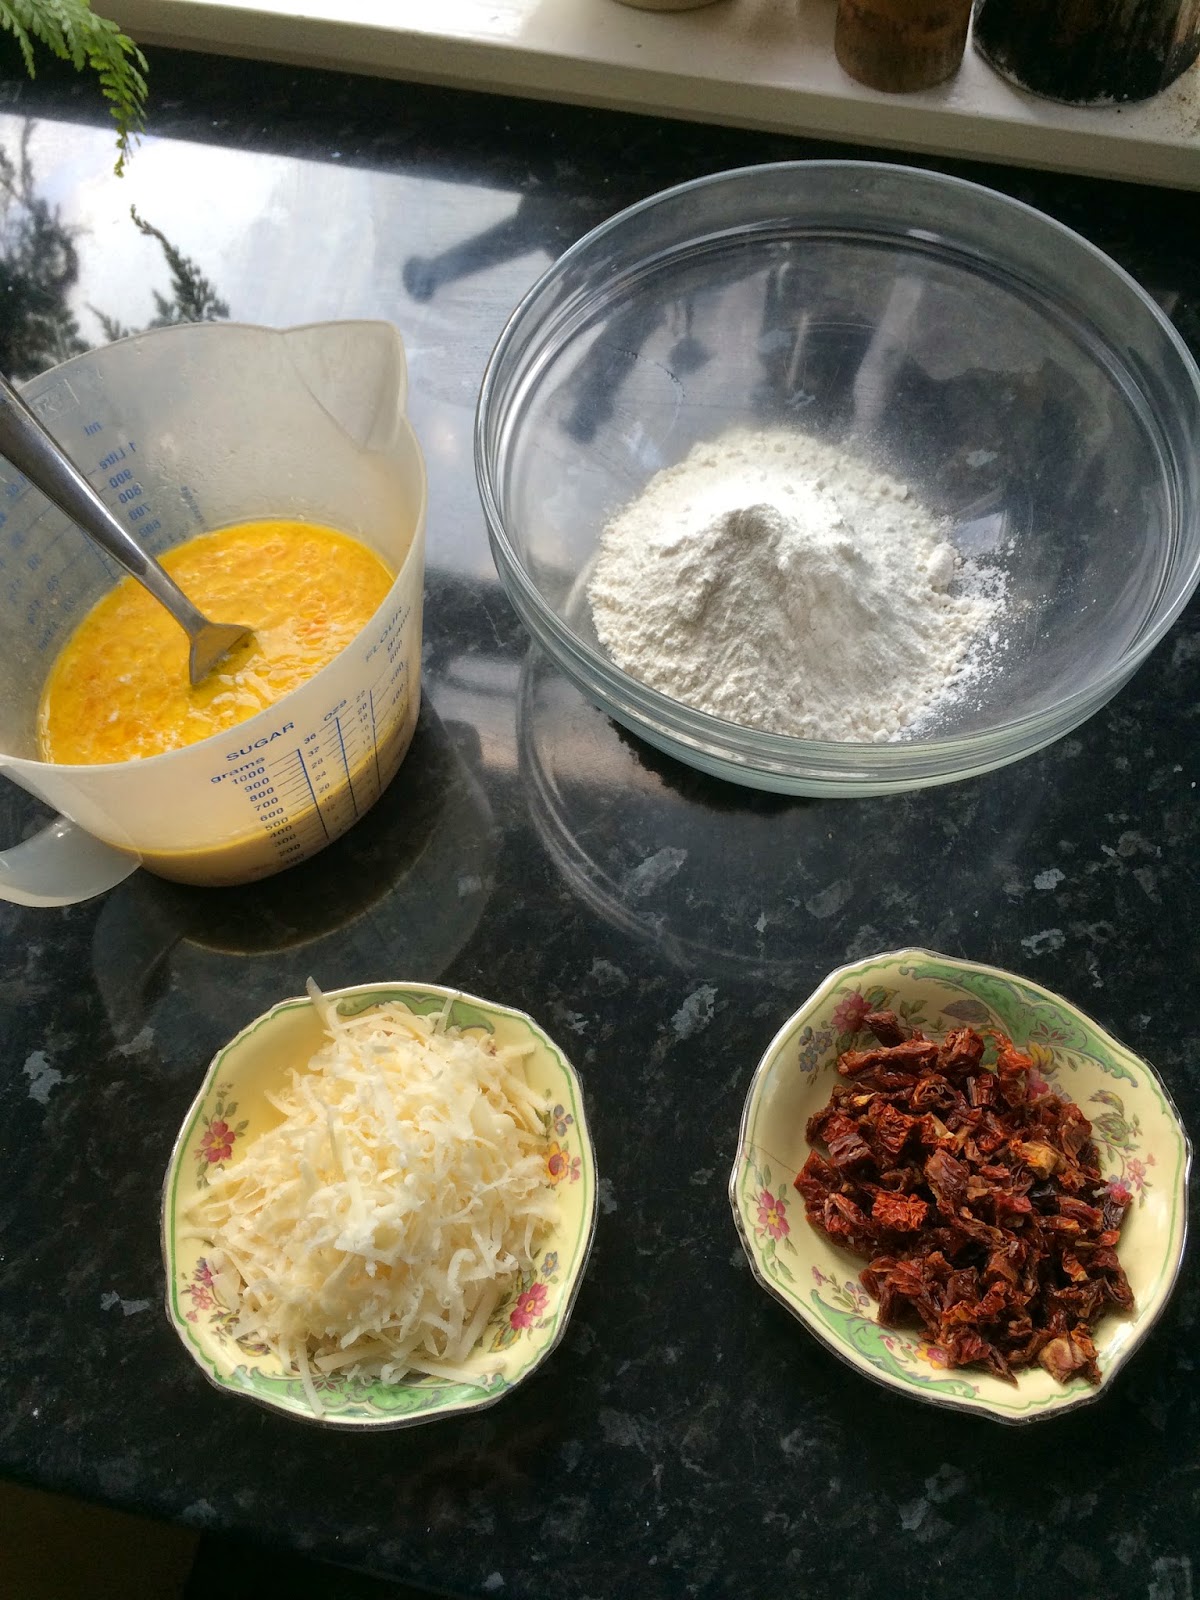
So this is extremely simple. Get the oven on at 180C (or 160C if you have a fancy fan oven). Stick the flour, salt and baking powder in a bowl. In another bowl, throw the milk, eggs, tomato paste and oil, and mix. Add the wet ingredients to the bowl with the dry ones and mix. Then throw in the chopped sundried tomatoes, and half of the parmesan and stir. Add all of this to a loaf tin which you have greased with butter, throw the rest of the parmesan on top and then cook for an hour. 


Once the hour is up, pull it out and be sure to stick a knife in the middle - if it comes out clean then you're golden. Let it cool before tipping it out and serving to your allergic friend.


Sunday, 18 May 2014

Chocolate and walnut brownies

OK you've waited long enough, this is it - the lady killer. Nobody can resist these brownies - I've even had people who are allergic to chocolate risk anaphylactic shock to eat one of them. If you're looking to seal any sort of deal with the Mrs - a night out with the boys, some Xbox playing time or being able to do that thing that you always want to do in the bedroom but that she never lets you do - this is the way to do it.

Super easy to make, these brownies are the perfect mix of slightly crunchy top and moist, gooey centre. And, just when you thought it couldn't get any better, you discover a chocolate chunk or a bit of walnut just to make it the whole experience even more satisfying.

How it's done

This is another one of those recipes that comes out looking and tasting like it requires some level of skill but is, in fact, ridiculously easy. You will need to get your hands on a rectangular or square baking tin. If you can't find one, and can't be arsed to wash up, you can buy the foil disposable roasting trays from the supermarket and just bin it when you're done.

  • 150g unsalted butter
  • 300g light muscovado sugar
  • 75g cocoa powder
  • 150g plain flour
  • 1 teaspoon of bicarbonate of soda
  • Pinch of salt
  • 4 eggs
  • 1 teaspoon of vanilla extract
  • 150g milk or white chocolate (either the bags of chips or bars cut into chunks)
  • A handful of walnuts
Turn on the oven to 190C. Get the butter cut up into chunks and put in a large pan over a low heat. When it has all melted, throw in the sugar and mix well. Sift the flour, cocoa powder, bicarb and salt into the pan and stir thoroughly, taking it off the heat. This will be a pretty dry mixture but don't stress about it!

In another bowl whisk the eggs and vanilla extract, and then add to the pan. Mix it all up into an awesome, chocolatey mess. Lob in the chocolate chunks and walnuts and stir quickly before sticking into the middle of the oven for 22-26 minutes. It should come out with a hard looking top but with a slight wobble underneath. If you stick a knife in and it comes out with a bit of the mixture on it then you're golden.

I have a feeling I'm going to be owed a lot of beer tokens when you guys see the results this will get you with the ladies. Maybe I should set up a PO box or something?


Wednesday, 14 May 2014

Apple and walnut cake

Yes dudes, we're back to baking again - but this one is a real doozy of a cake. Perfect for a rainy Sunday afternoon when you're stuck in the house - whoever you're baking for is sure to go crazy for this cake and you'll be using up brownie points you accrue for days. It's up to you how you want to cash them in - just don't waste them!

The house smells incredible as this baby is cooking, and the apple and cinnamon combo with the crunch of the walnuts is amazing. It's so good that I almost used the word 'divine' there but found the last remaining smidge of my masculinity and turned it around. That was a close call. Just hold on a sec whilst I head outside and wrestle a bear...

How it's done


Another nice and easy cake, this is really just a 'chuck in, stir and stick in the oven' kind of a deal. I've used a loaf tin but you can make this in whatever shaped cake tin you can lay your hands on.

  • 2 small apples, cored
  • Large handful of walnuts, chopped
  • 100g butter, softened
  • 100g sugar
  • 2 eggs
  • 180g self-raising flour
  • 1 teaspoon baking powder
  • 2 teaspoons of cinnamon
Get the oven on to 180C. Take the apples, slice them up nice and thinly into small pieces and put them to one side. Cream the butter and sugar together in a bowl before breaking in the eggs and adding the apples and walnuts. Mix into a chunky mixture. 

Add in the flour, baking powder and cinnamon and mix. Tip the mixture into your loaf or cake tin and stick into the middle of the oven for 40 to 45 minutes. To check if the cake is done, put a sharp knife in through the middle and if it comes out clean then you're good to go. 

Serve a slice of this to the Mrs with a cup of tea and sit back with a nice, smug look on your face as you await your reward. 


Saturday, 10 May 2014

Marble cake

Now I know I said in a previous post that I don't really work to strict measurements but today I have a lady-slayer of a cake for you that does require the remembering of one magic number - 225. Got it? Then let's begin.

Marble cake is a classic, retro cake that always impresses because it looks like its really hard to make when it is, in fact, a piece of piss. It's a basic cake batter recipe, split in two and mixed all fancy like. As I've said previously, don't feel like you're losing your masculinity each time you even think about baking a cake - women love them and you are becoming more potent just by reading this blog post. Can you feel it?

My test case in this instance is my flatmate, a single white female of a similar age to me. All I had to do was merely show her the uncooked batter in the cake tin and she was running to her room to pick out a clean pair of underwear. Whilst the cake was in the oven, every time she caught a whiff of that half-cooked cake smell she'd emit a groan that is usually reserved for the bedroom. Women LOVE cake. 

How it's done

So, back to the magic number. 225 is the number of grams you need of each of the core cake batter ingredients - flour, butter and sugar. The rest of the ingredients are nice and easy to get hold and in fact, you probably already have most of them lying around.

  • 225g of butter (this should be left out at room temperature for a while to soften)
  • 225g caster sugar (if you don't have any caster, just use granulated)
  • 225g self-raising flour
  • 4 eggs
  • Tablespoon of vanilla extract or flavouring
  • 2 tablespoons of cocoa powder
  • 3 tablespoons milk

This really is dead simple. Firstly, get the oven on to 180C or 160C if it's fan-forced. Grease a cake tin using a folded up piece of kitchen paper and some of the softened butter. Cream together the butter and sugar. If you can lay your hands on the Mrs' mixer or hand blender this will be a hell of a lot easier, but if you'd rather be all tough then by all means mix by hand with a wooden spoon. Crack in the eggs one at a time and mix well after each one. Finally, throw in the flour, vanilla extract and milk and mix all together until smooth.

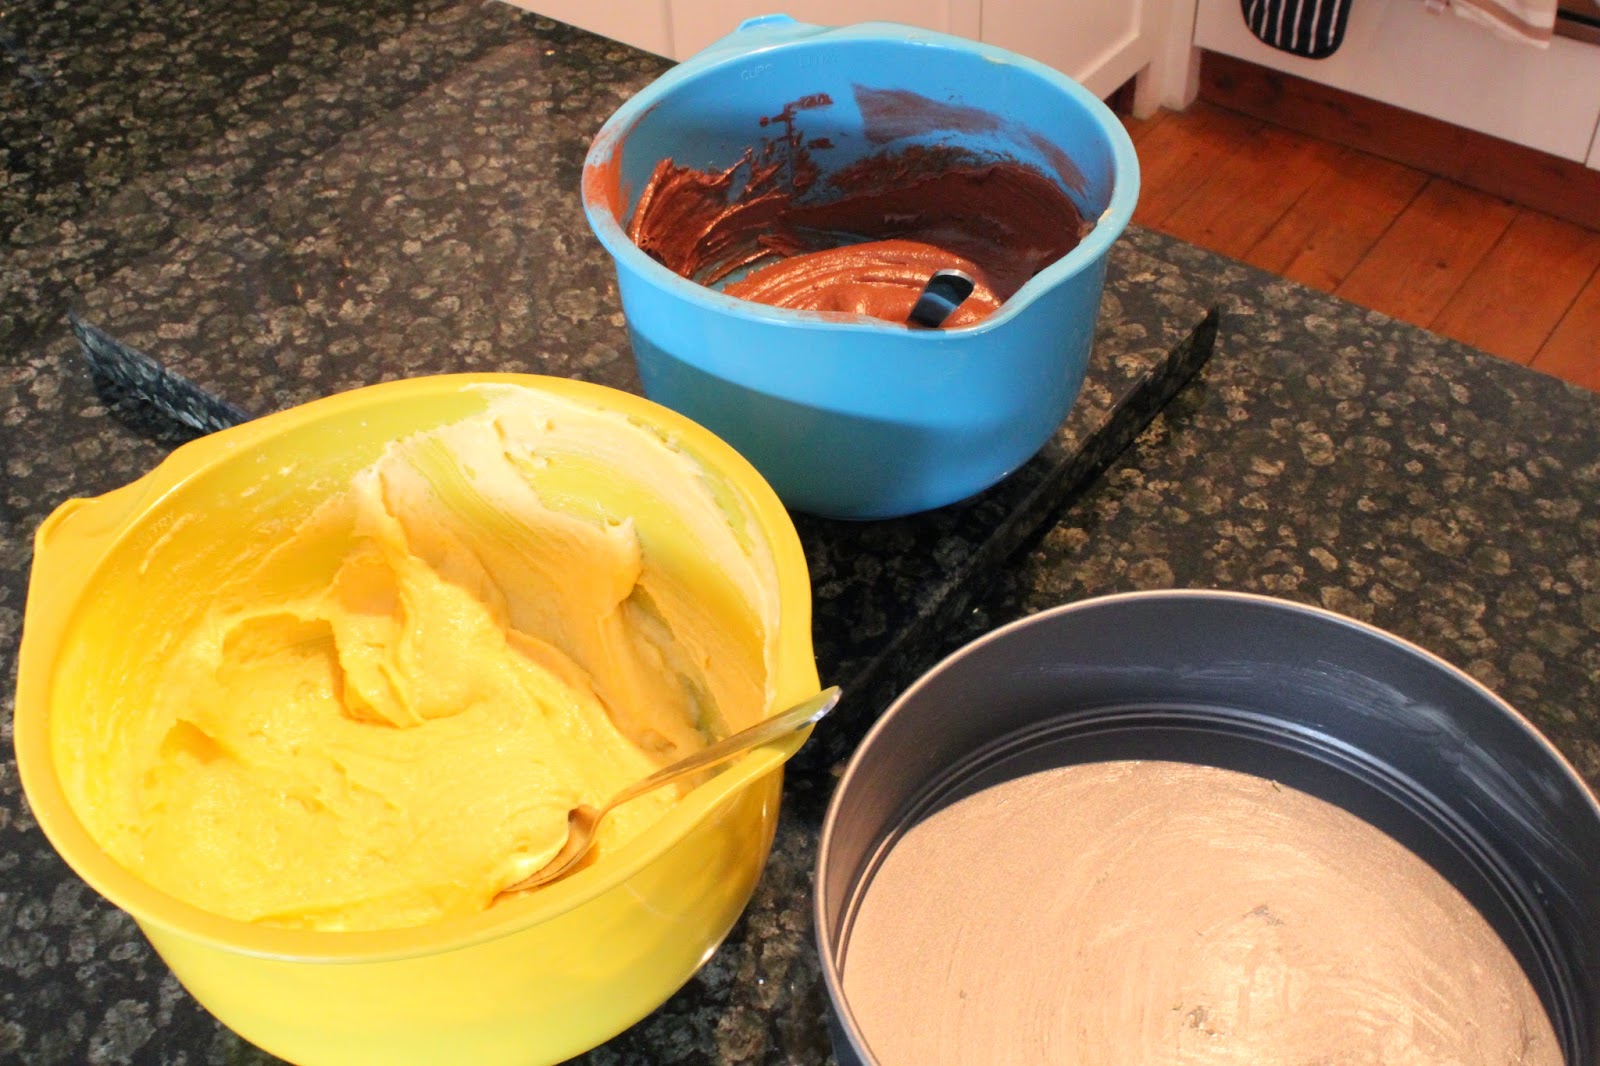
Here's where the magic happens. Move half of the mixture into a separate bowl and add the cocoa powder. Mix that in until you have the same consistency as the other batter and now it's time to bring out the artist in you. Use two spoons to dollop in one batter after another into the cake pan. Once all the mixture is in and you can't see the bottom of the tin, grab a knife and swirl the mixture around to make a pretty pattern - how butch do you feel right now?

Stick the cake in the middle of the oven for 50-55 minutes. The way to check if a cake is fully cooked is to take a skewer or a knife and put it in the centre all the way to the bottom, if it comes out clean then you're good to go. Leave the cake in the pan until cooled (don't be impatient!) before taking it out and serving it to the Mrs with a cup of tea. Honestly you will be in the good books for days with this one and all for 15 minutes worth of baking. Good times...


Thursday, 8 May 2014

Strawberry and banana smoothie

So anyone who's anyone knows that smoothies are the shit at the moment. Women on a health craze love them, meatheads in the gym love them - everyone loves them. Naturally, being the sheep that I am, I had to get involved and was straight down the shops to spend twenty quid on one of these fancy smoothie-to-go machines knowing full well it would just be a fad. How wrong I was.

Smoothies are awesome. They take seconds to make, taste delicious and people are always impressed when you make them one; hence their inclusion here. Perfect for replacing lost energy after a hectic night in the bedroom, or building stamina ready for the next session - smoothies are magical.

This is the start of a series of smoothie posts to help you whip up a delicious and (usually) healthy drink for the lady's breakfast to go, mid-morning snack or just a random 'here you go love' effort for those extra brownie points (again, the brownie recipe is coming, hold your horses!).

We're starting off with your basic, classic strawberry and banana smoothie. Dirt cheap but delicious. 

How it's done


Most most fruit-based smoothies will have two key ingredients - a banana and some form of fruit juice. You can mix and match to your heart's content but I've gone with Pink Lady apple juice (because I'm a posh twat) for this one. Literally all you do is take what's shown in the photo and lob it in the juicer - easy as. Slice up the banana, same with the strawberries (don't leave the green tops on though you bell-end), throw in some low or no fat Greek yoghurt and the juice of your choosing before blitzing the shit out of it.

In case you're wondering what the weird powder stuff is - that is your magic weapon. Superfood powder. Available online or in most health food shops; she will be impressed that you've gone to the effort to find her something so good for her body and you will see the benefits in the gym. Boom!

Check back soon for more smoothie variations and feel free to share your own. P.S. check out the wolf dog in the photos - every man should have one of these. Try walking down the street with her and not get stopped by every woman asking for a stroke...

If you're interested, the machine I use is the Morphy Richards Easy Blend. It's only small so fits perfectly in the kitchen cupboard full of crap in between that popcorn machine and the bread maker. It comes with two beakers with screw on lids - perfect for sticking in the gym bag or in the Mrs' lunch bag with a beautifully written note about how this smoothie shows how much you love her which, if she is able to read between the lines, actually means you're expecting some loving when she gets home for being so thoughtful. 

Tuesday, 6 May 2014

Pumpkin and cottage cheese muffins

So apparently real men don't bake. Well let me tell you, those that want to get noshed off on a regular basis should. Girls go weak at the knees for a dude that knows his way around a whisk and some self raising flour. If you don't have anyone at home to impress with baked goods then be sure to make it for the folk in the office. Sarah from Accounts won't be able to resist you once she's put that moist, rich brownie in her mouth. That's not a euphemism, I actually do have an awesome brownie recipe coming up but slow down cowboy, you aren't quite ready for that yet.

What you are ready for is these awesome, fluffy and easy as shit to make pumpkin and cottage cheese muffins. What's great about these is, if you get the right ingredients (i.e. the low fat cottage cheese) they are healthy so not only have you cured her snack desire, but you are supporting her current healthy eating phase - which is basically an ongoing cycle of saying they're going to eat healthy, eating rabbit food for a week and then giving up.

These are another minimal effort recipe that will get the results you want in no time. Fifteen minutes worth of preparation time will result in hours of fun in the sack for sure.

How it's done

Grab yourself the following ingredients, this should be enough for 12 muffins. You do need to dig out the muffin tray though - every house has one but you might need to get your head right into the back of that never opened cupboard to find it. 

  • Olive oil
  • An onion
  • Some fresh rosemary
  • 300g self raising flour
  • A pinch of salt
  • 250g cottage cheese (low fat if you're out to impress)
  • Around 250g grated pumpkin (or butternut squash)
  • 250ml milk
  • A couple of eggs that you've beaten
  • Some pumpkin seeds for decoration (come on, you've already started baking, there's no going back now...)

This is all very simple, get the oven on at 180C before dicing up the onion and frying in the olive oil for around five minutes. Chop up the rosemary and throw that in for the final 30 seconds. Are you getting that awesome smell? That's it my friend, you're cooking!

Put the onion and rosemary into a large bowl and then chuck the flour, salt and grated pumpkin in and mix. In a different bowl mix the eggs, cottage cheese and milk and then add to the pumpkin mixture. The trick with this recipe is not to mix things too well - you want a lumpy mixture so only stir this all up until it is just combined. 

Grease the muffin tin (just get some oil on a folded up bit of kitchen roll and rub each muffin hole so they are nice and lubed) and split out the mixture evenly between the 12. Throw a few pumpkin seeds on top of each and get them in the oven for 25-30 minutes. Once you pull them out just leave them in the tray to cool and once they have, just give them a little twist and they should pull right out, ready to be put on a tray and into the willing mouth of your beloved. 

You are welcome my friend.


.